
This is a paid partnership in collaboration with
Hobbycraft.
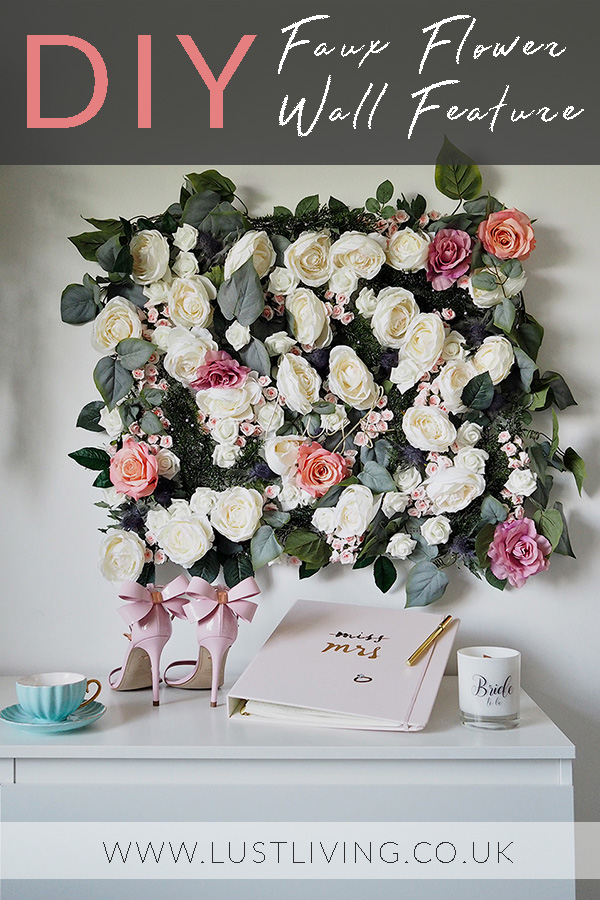
Flower walls are still huge, they’re a feature in all the famously Instagrammable restaurants, beauty salons, they’re used as back drops for events and parties and they’re used a massive amount for weddings. If a flower arch is good enough for Meghan and Harry then it’s good enough for me! Hats off to their wedding florists… they did one seriously incredible job, but that kind of thing just isn’t within budget for a lot of us. Hence this DIY – for a more affordable, achievable, smaller scale version, but that can totally be scaled up if and when required.
I’ve teamed up with
Hobbycraft, the UK’s leading craft retailer, to create a DIY Faux Flower Wall. Although this idea came to me inspired by engagement/wedding decorations, you could of course use a faux flower wall piece for any event, party, or even just as a feature piece in your home. Whether you’re planning a party, a wedding, you name it –
Hobbycraft have something for everyone, seriously, Oh and before I forget, there’s a 15% off discount code for
Hobbycraft at the bottom of this post in case you’re feeling crafty!
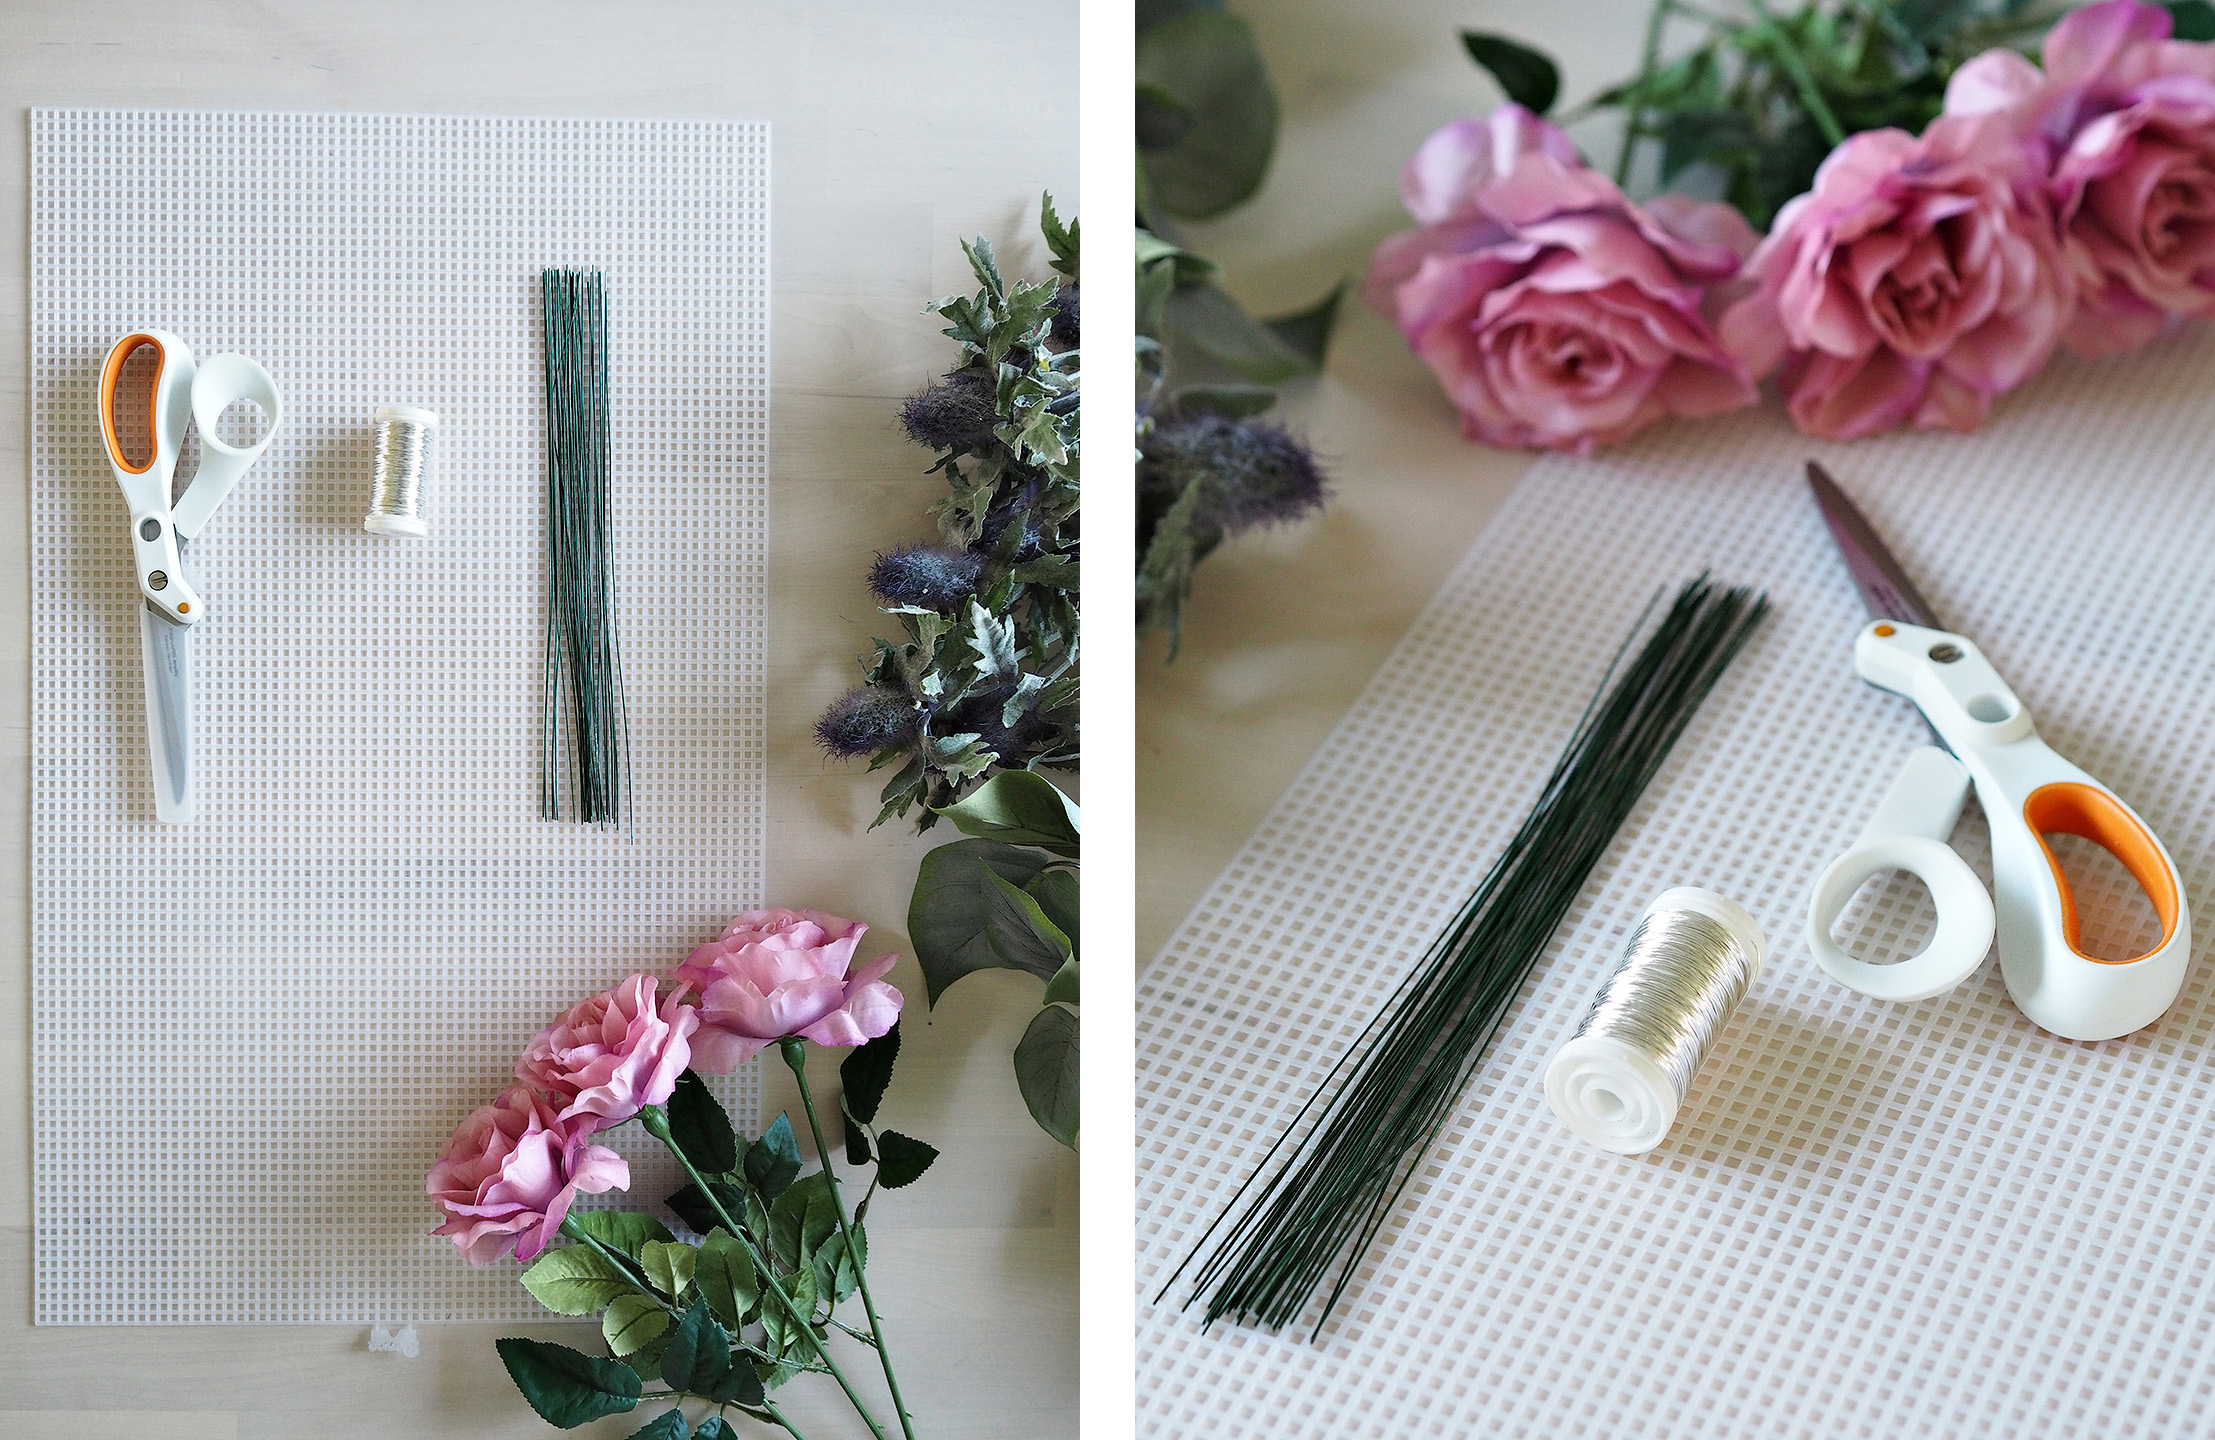
Now before I even start, the first thing you need for this DIY is a bit of patience, this is not a quick job – depending on how big or small you make yours of course, but this one took me a few hours. I’ve always loved a bit of crafting though, I find it quite therapeutic concentrating on something creative for a while. So maybe you will enjoy it like me? Other than patience, everything else you need you can find below:
Darice Mesh 5 Count Plastic Canvas 33 x 56 cm x 2
Oasis Green Hobby Wire 25 cm
Oasis Silver Metallic Wire Reel
Servocut MicroTip Scissors 21 cm
Ivory Rose Bouquet 8 Pieces x 4
Pink Polyfoam Wired Roses 12 Pack
Cream Tea Rose Bunch 12 Pieces
Flocked Philo Garland 1.8m
Lilac Foam Berry Bush 5 Pieces x 2
Lilac Flocked Eryngium Spray 48cm x 2
Peach Olivia Rose 72 cm x 3
Lavender Rose Stem 44cm x 3
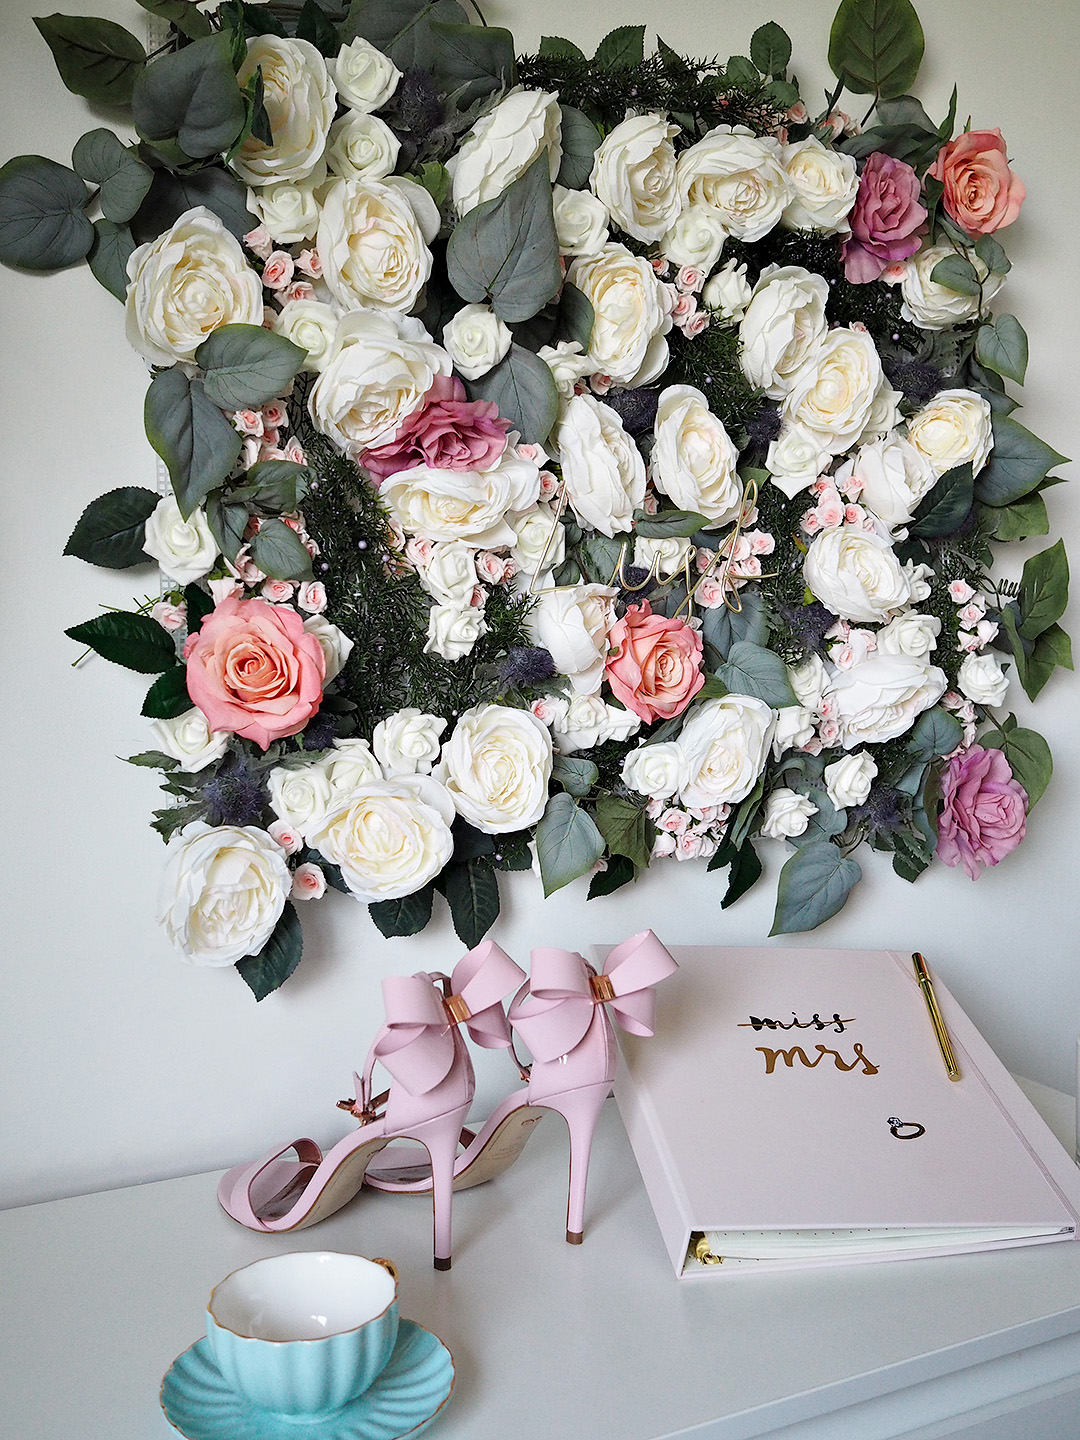
So depending on how big you want your flower wall piece, you will firstly need to get the base size using your plastic mesh canvas. For this project, I used 2 x plastic mesh canvas so that the finished piece was roughly 1m x 60cm, but of course you could go smaller or you could go way, way bigger.
Firstly, I attached the pieces of mesh together using the Oasis Green Hobby Wire – this wire is really strong so don’t worry about the weight of the finished piece pulling the parts apart. Simply overlap the pieces of mesh slightly and then weave the wire through – just as if you were sewing them together, keep weaving it back through until the two are secured firmly to one another. Do this all the way along the edge of the two until they make one solid piece. Don’t worry about the wire looking a bit messy – this is all going to be covered by flowers.


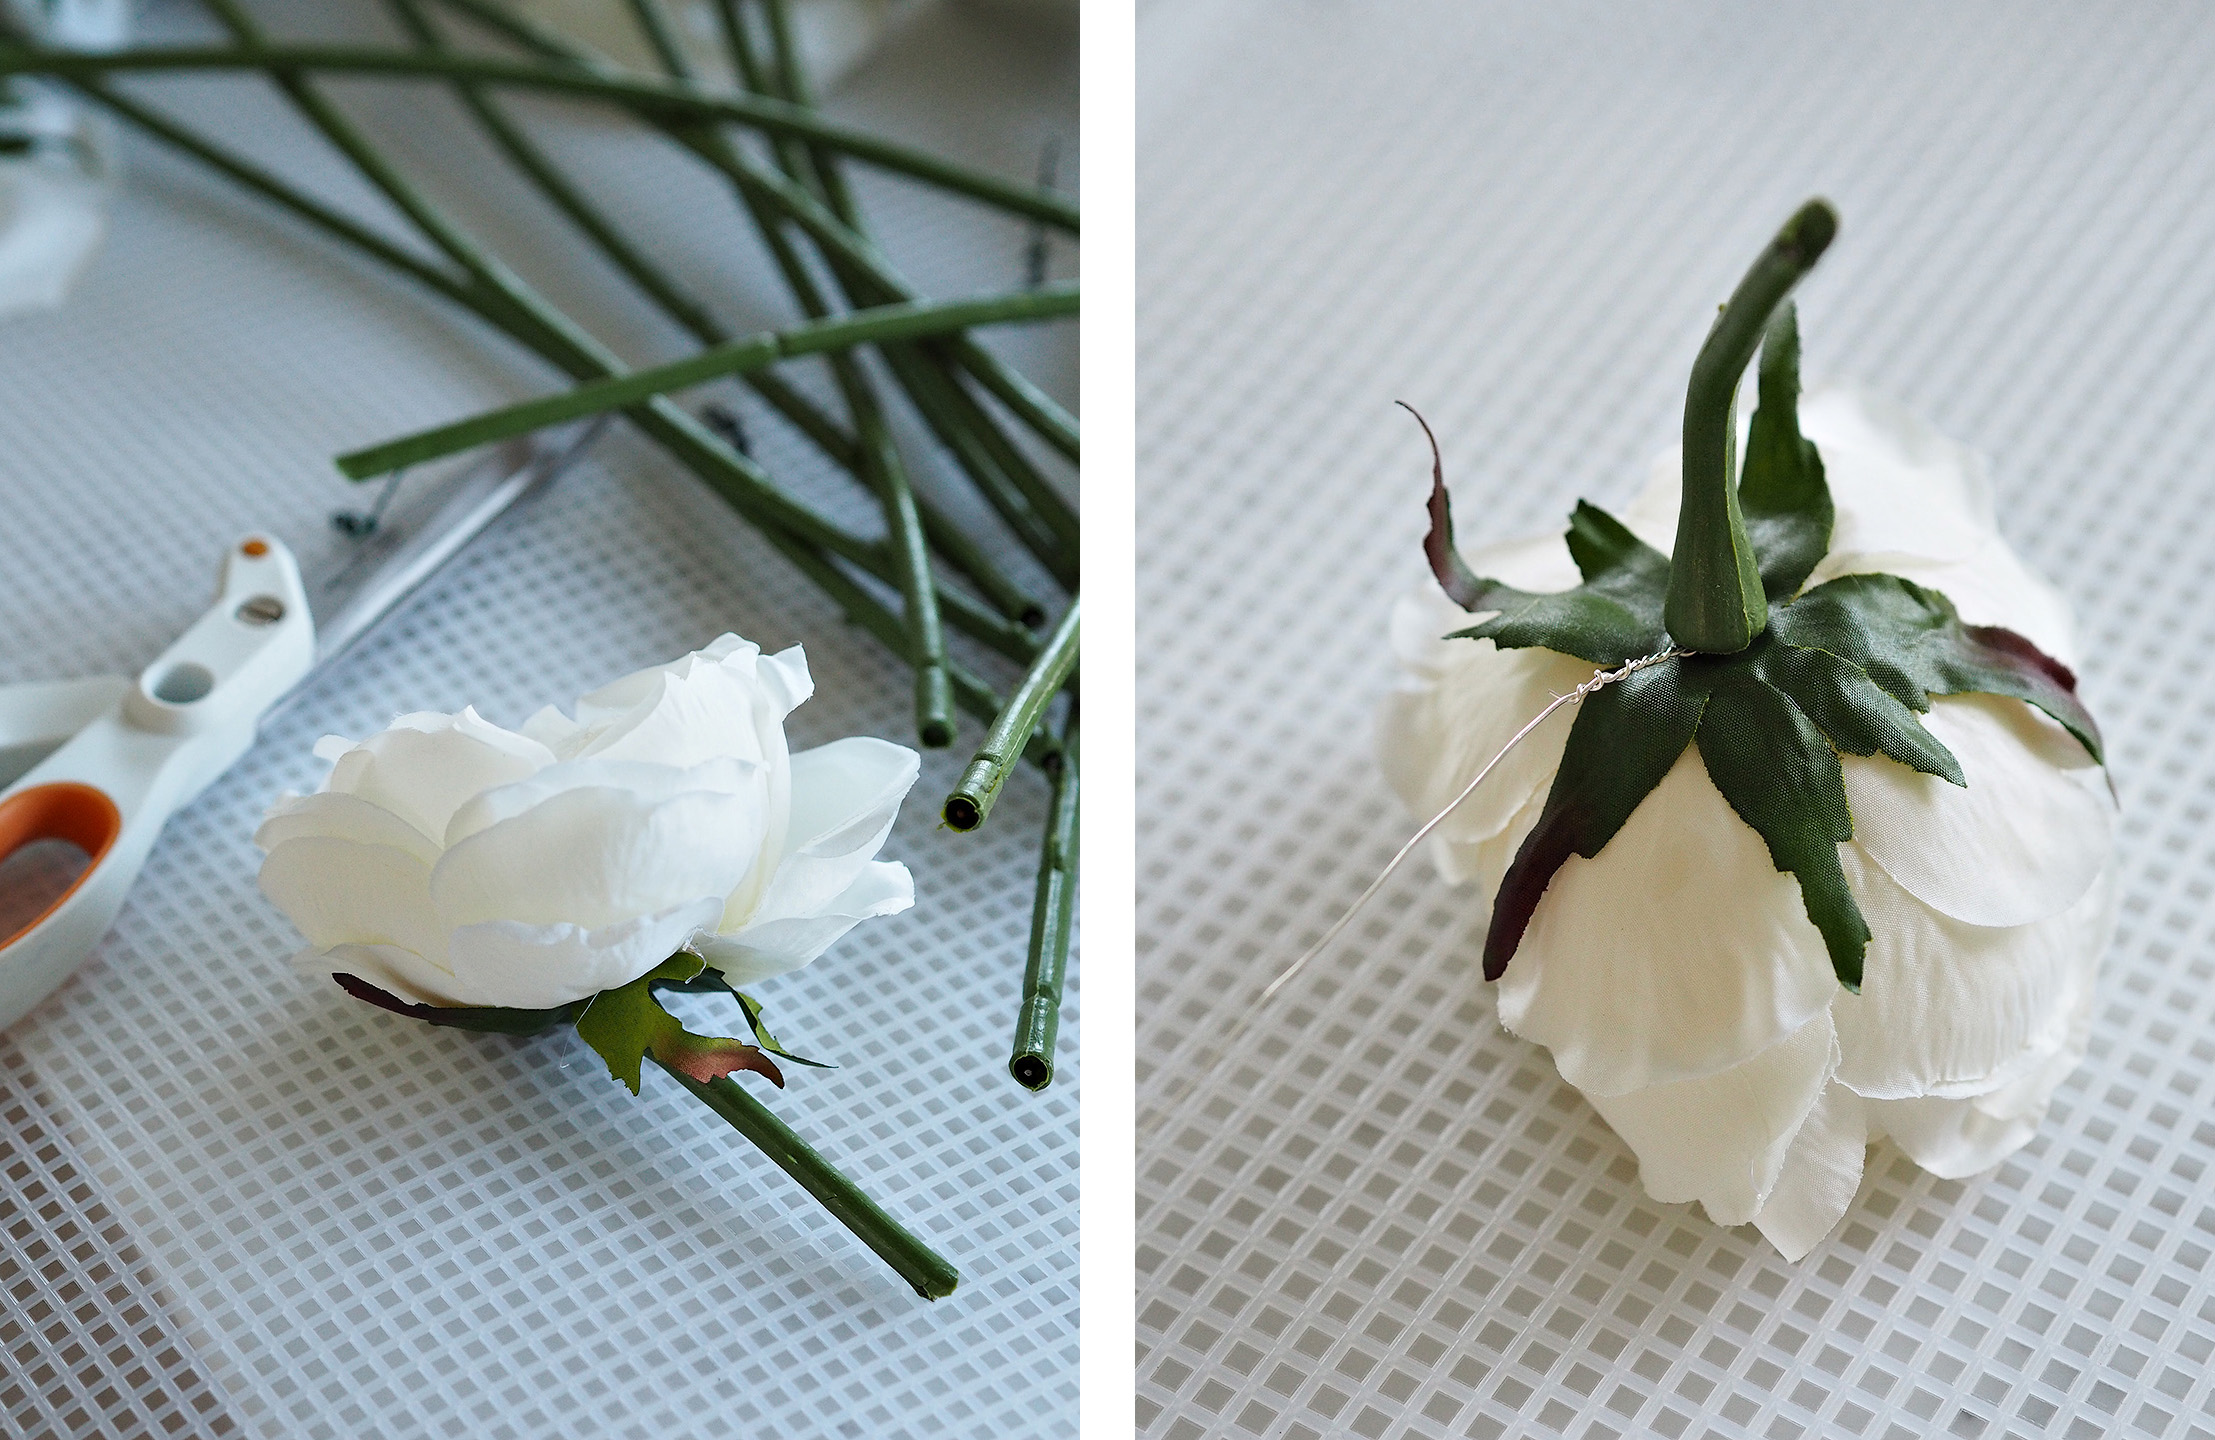
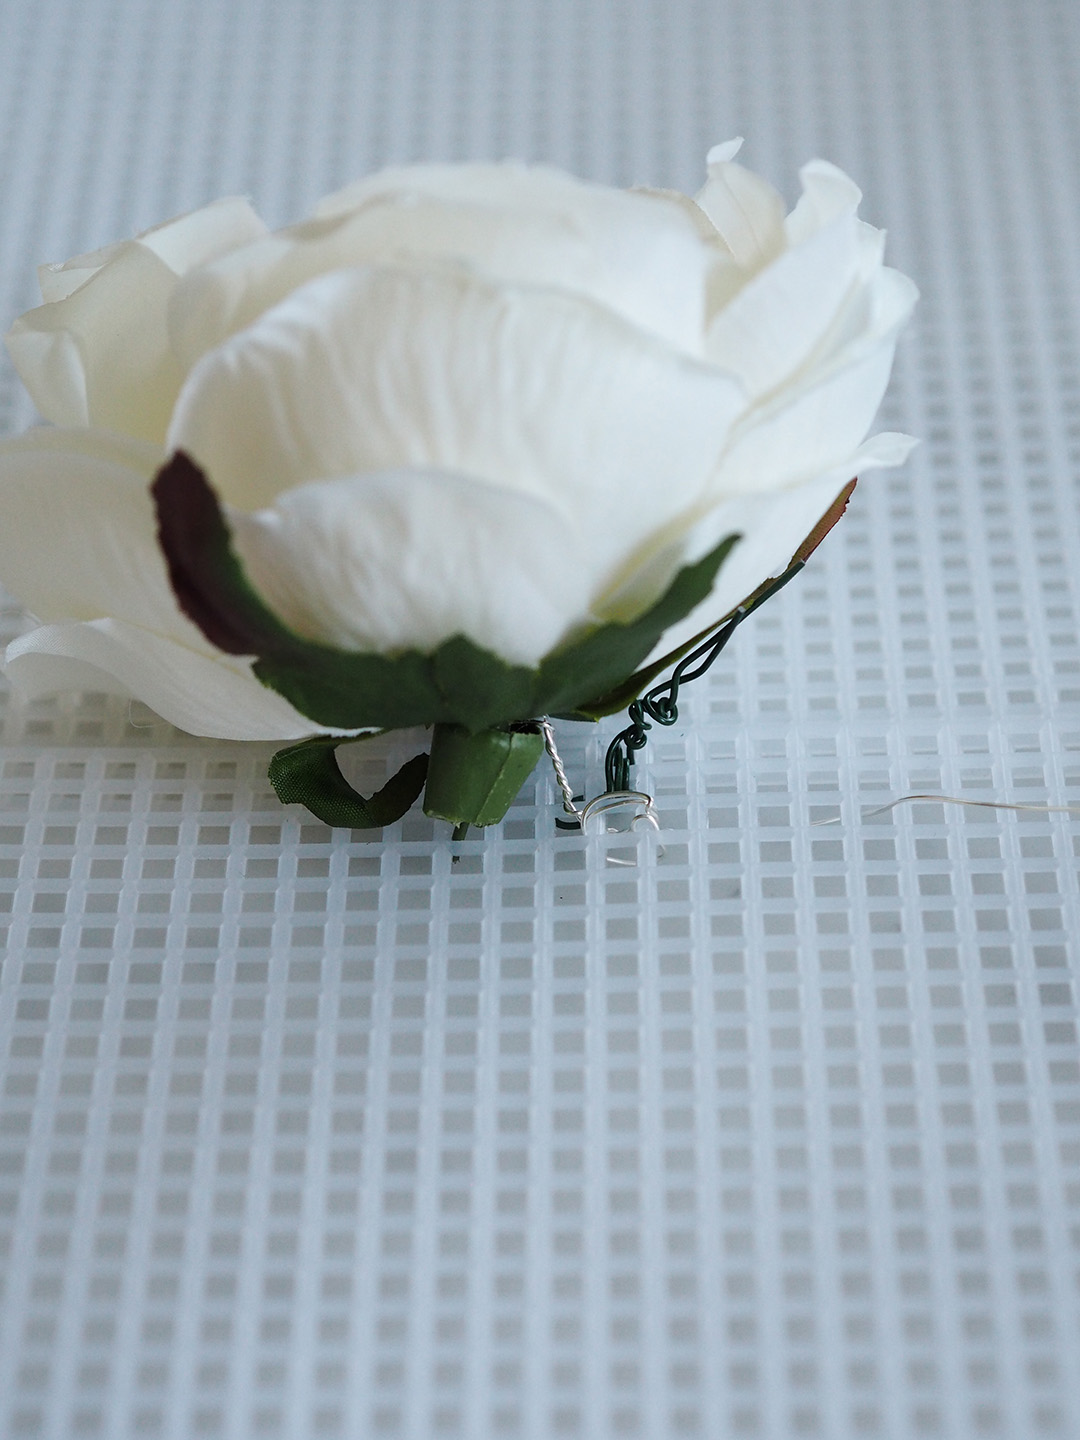
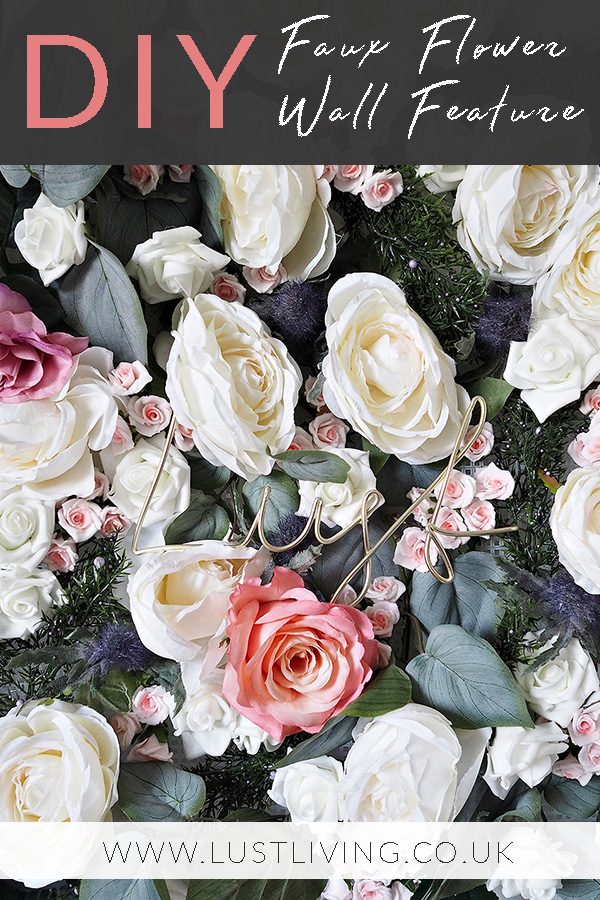
Now it’s time to start adding the flowers. It’s best to start with the largest flowers (Cream Tea Roses) that you have, chop the stems (cut through the plastic stem with your scissors then bend the stem back and forth to snap through the metal) so you have about 1.5cm of the stem left – keep the stems, you will need the leaves on the stems for later on. Now with your flower head, cut a piece of Oasis Silver Metallic Wire about 20cm long and wrap one end around the flower stem (right where the stem joins the flower head) so it’s securely attached, then with the other end of the wire – weave it through the mesh and pull it tight then continue to weave it through (as if you were sewing it to the mesh) until it’s secure. If the stems are thin enough then you can just poke the stem through the mesh and bend it at a right angle at the back to hold the flower in place.

Repeat this process with all your large flowers – add them one colour at a time so that you can spread the different colours out randomly. Use the space – don’t cram all your big flowers into one section, the mission by the end of this is for us not to be able to see any of the mesh so you need to spread all of the faux flowers and foliage out.
After you’ve added your large flowers, it’s time to add the foliage (flocked philo garland), use a trailing foliage for around the edge as this will hang off the edge nicely and make the whole piece look more authentic when finished. Be sure to use some greens to fill some of the space in the middle of the mesh too – you can of course use just flowers if you wish but you will need a lot of flowers to fill the space, foliage is quick way to fill space. I used the Oasis Silver Metallic Wire again to add the foliage.

Once you’ve got all the green decoration attached, you want to add more flowers – make sure you’ve added all your large flowers (
Peach Olivia Rose and
Lavender Rose), leaving the smaller flowers (
Pink polyfoam roses and
Ivory roses) for last. These are what you are going to use to fill all the small gaps that are left. The smaller flowers tend to have much thinner stems so you can simply poke these through the mesh and ‘sew’ in to secure. Don’t be scared to bend the stems to manipulate where the flower heads will sit – they are much stronger than they seem.
Now that you’ve filled the mesh, you’re pretty much done, just one last thing. Pull the leaves from any stems you cut off earlier on. You’re just going to add these to the frame of the mesh to make it look less square and more natural – you can either wire them to the mesh or just weave under existing flower heads and they should hold.
And that’s it. You’re done. Now you have your final piece you just need to decide where you’re going to put it. As it is, it’s very easy to secure to a wall with a few nails and that’s what I did. Voila!


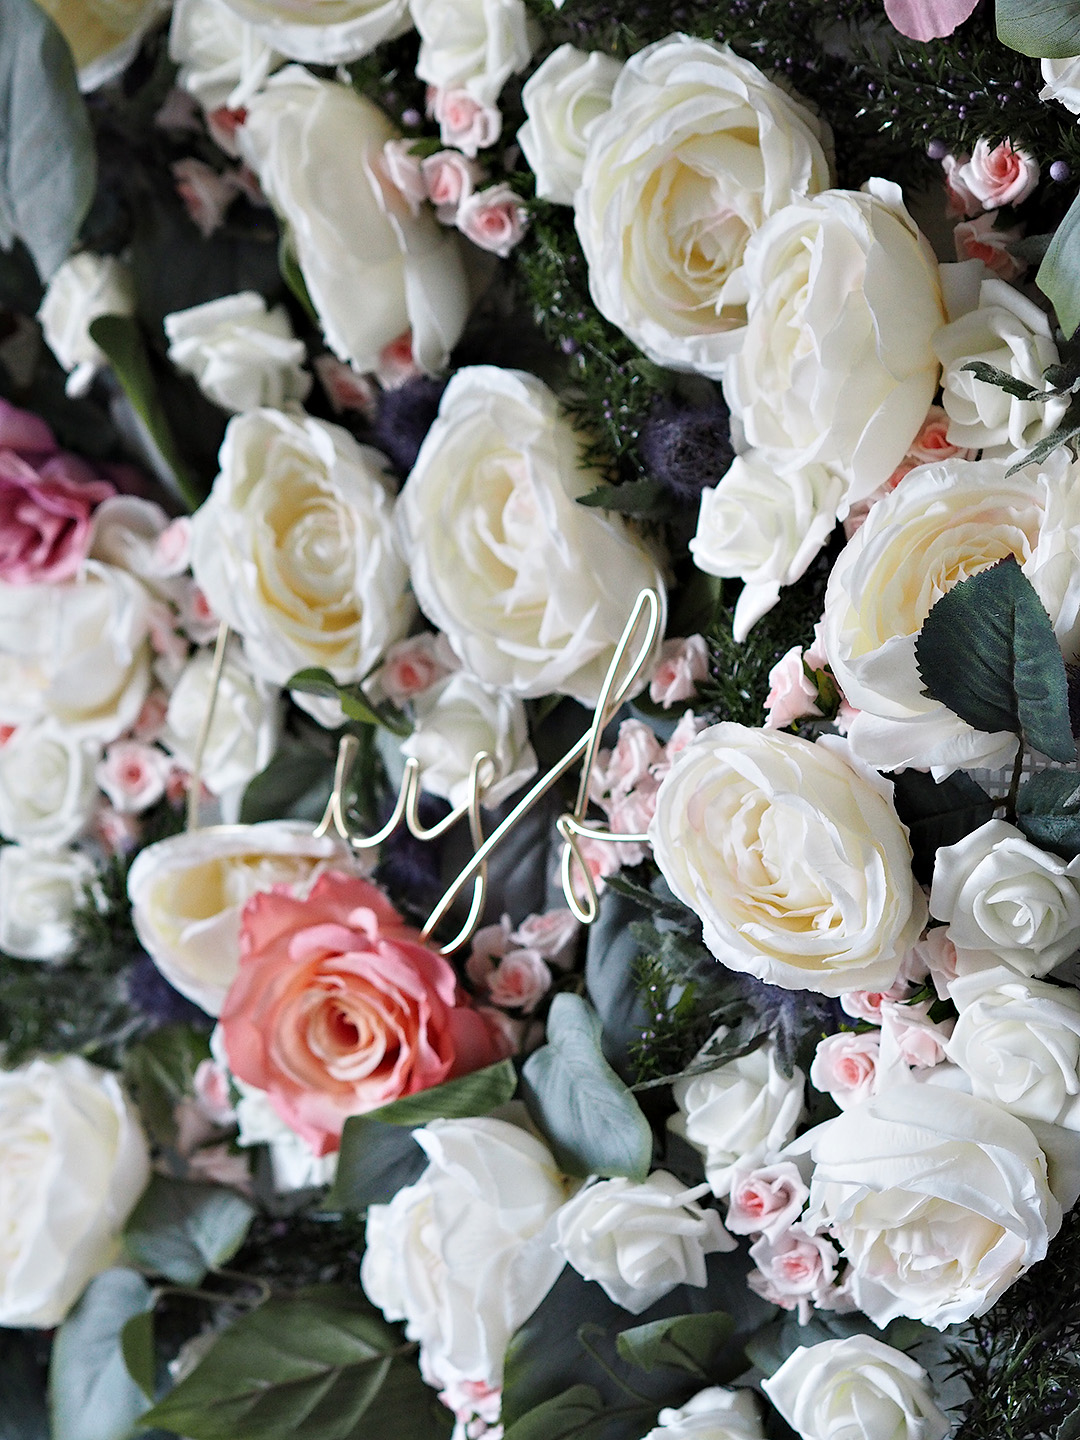
If you’re using your faux flower wall for an event or a wedding than you could attach wire words to mark the occasion like below!


I hope you enjoyed this DIY and I hope it inspired you to get crafting yourself!
You can use code DIY15 to enjoy 15% off
Hobbycraft to help with any crafting you get up to! Code expires 18th June 2018, excludes sewing machines.

Hia. Amazing tutorial. Would I use the same method for trailing flowers on a cake table. So they look as if they are trading off the table from the bottom if the cake?