
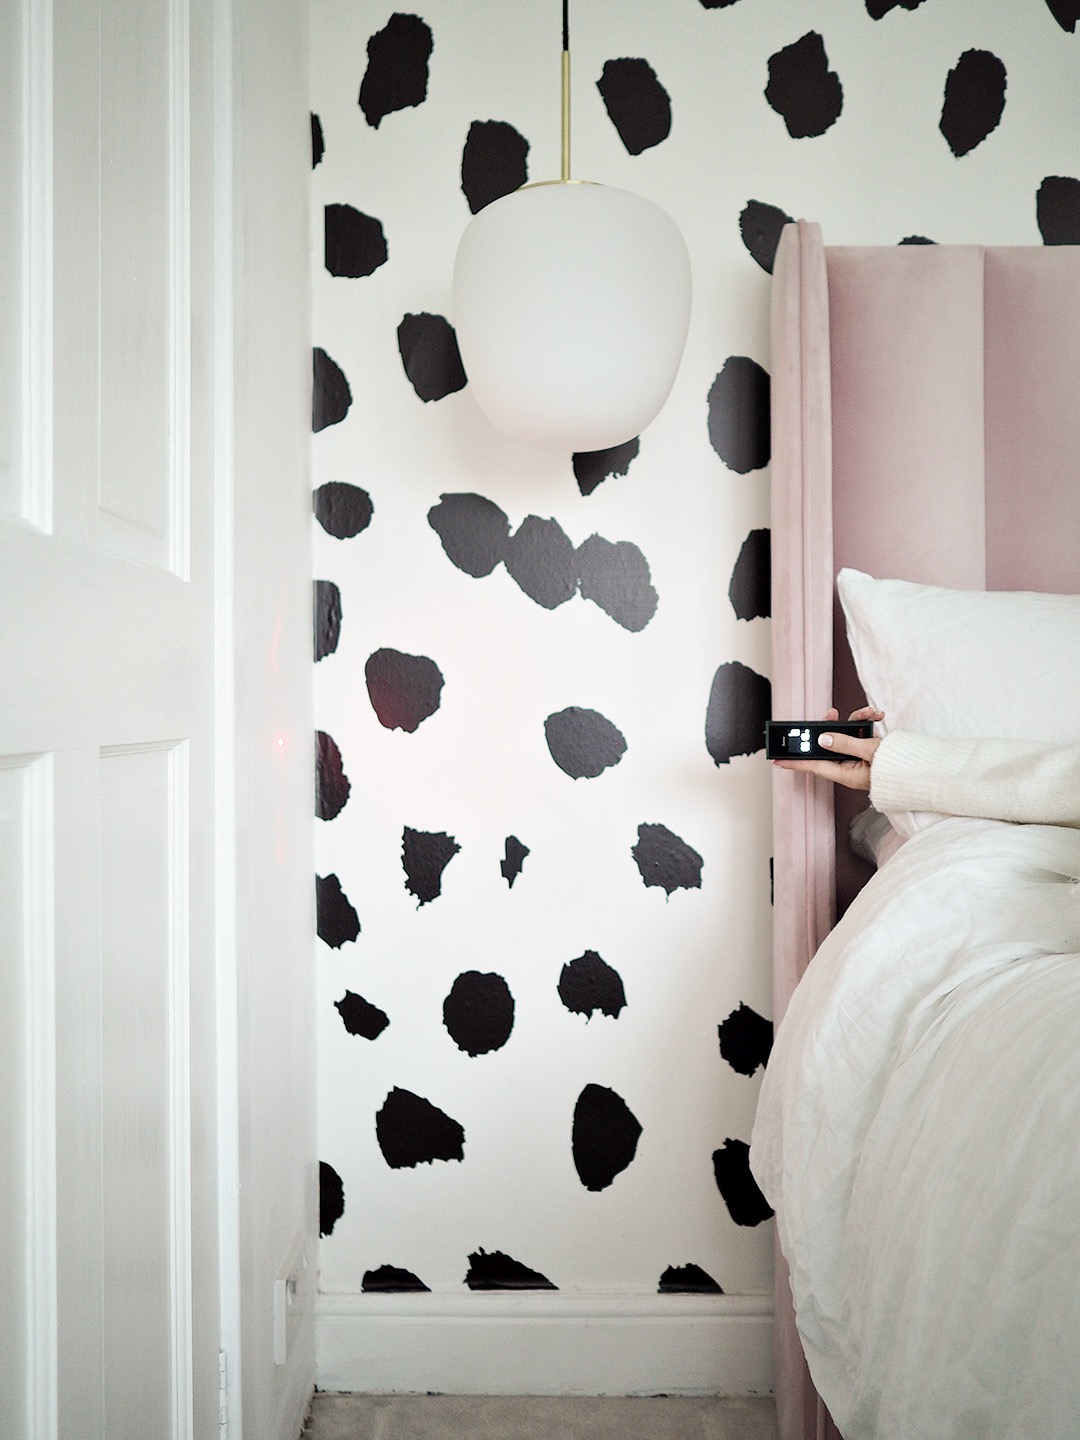
It’s been a couple of months since our last DIY and I’m so happy to be back at it, and this time, working with Bosch DIY & Garden to get my creativity flowing once again! I’ve up-cycled this IKEA bedside table to match our Rattan Cane IKEA wardrobe DIY Hack that we completed a few months ago. Today’s DIY is super easy to follow, it only took me just over an hour to complete and it’s so effective once finished – all the Bosch DIY & Garden Power Tools that I used are cordless and light which makes them so much easier for me to use by myself without needing Matt’s assistance for a change!


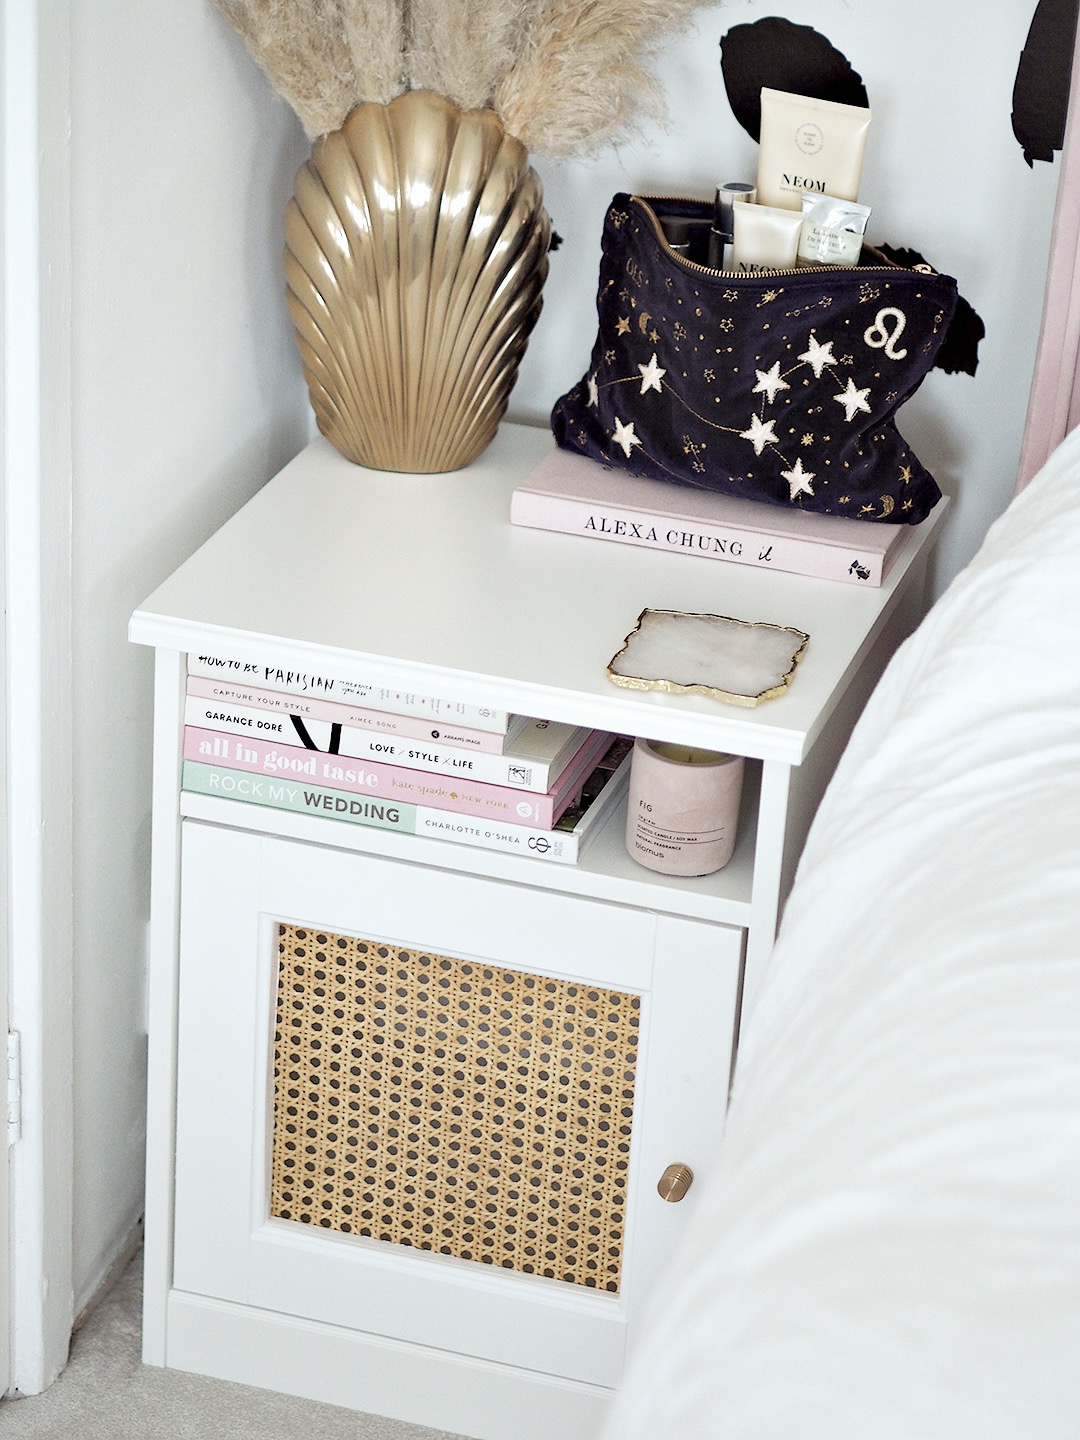


Now whilst I used an IKEA bedside table, this could be applied to any piece of furniture, perhaps you have something in your home that just needs a little makeover.
You will need:
- Bosch 18 V AdvancedImpact 18 Combi Drill
- Bosch 18 V Circular Saw
- Hand Saw
- Wood Filler
- Bosch 18 V Sander
- Bosch Zamo Laser Measure Set
- Bosch Tacker Or GluePen
- Protective gloves, ear protection and goggles
- Handle (if you want to change the handle that is, I wanted ours to match the handles on our wardrobe)
- Scissors
- Pencil
- Paint
- Rattan – Fortunately we had some left over from our wardrobe DIY
- Your chosen furniture – I used the £40 IKEA Songesand Bedside Table to match our wardrobe.
Step 1
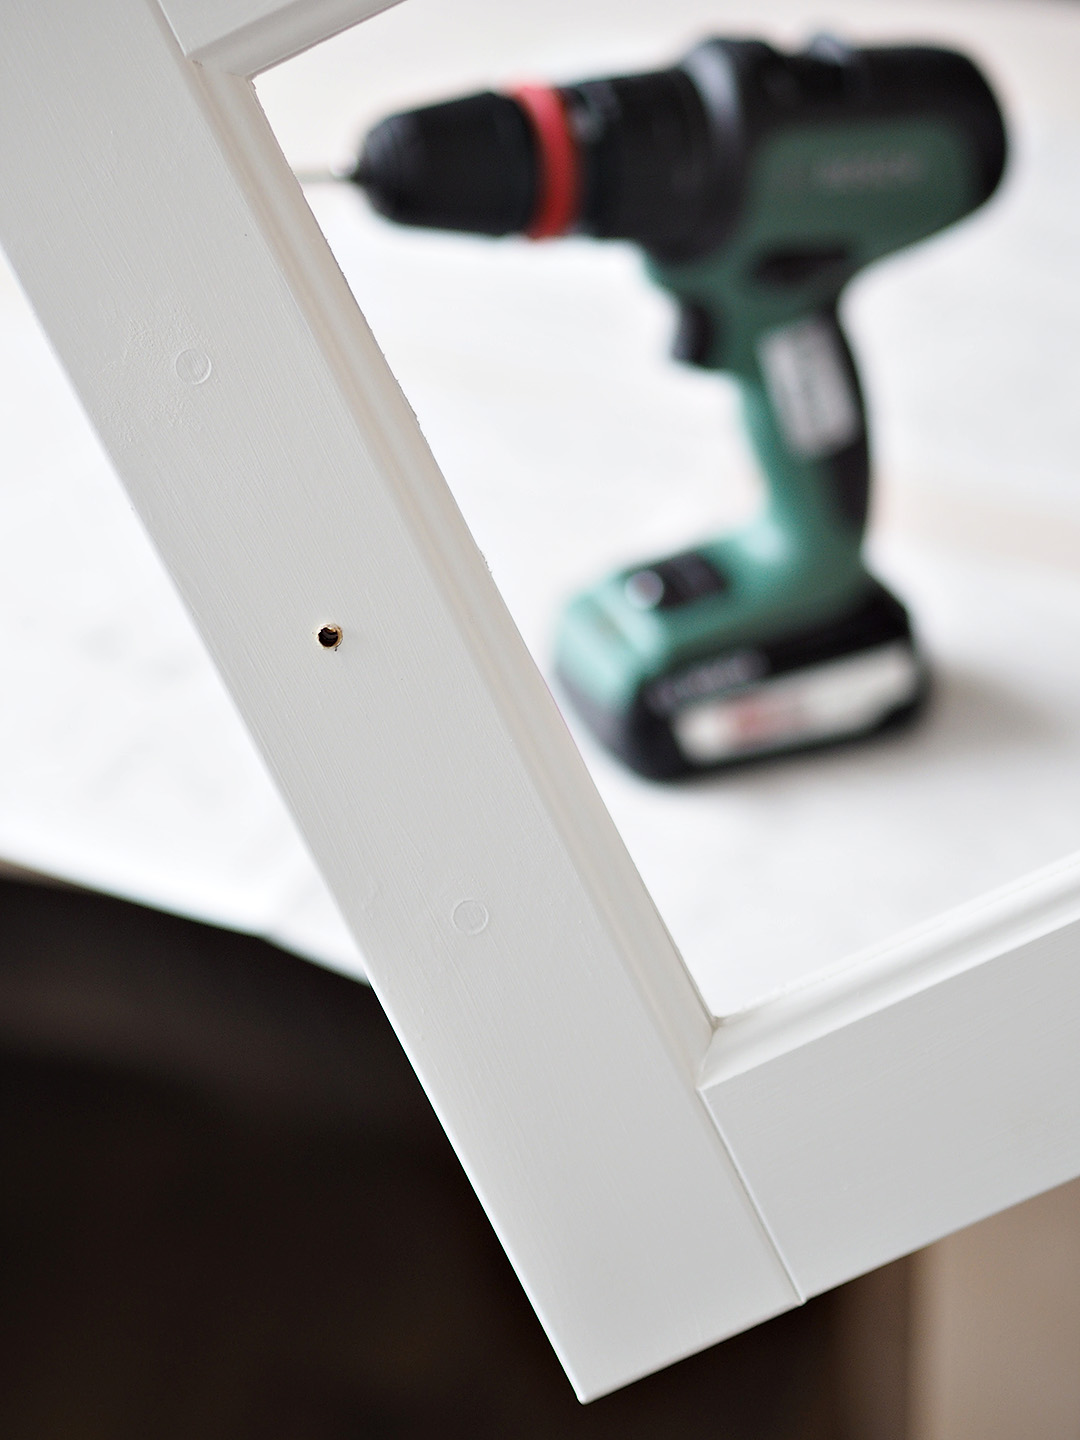
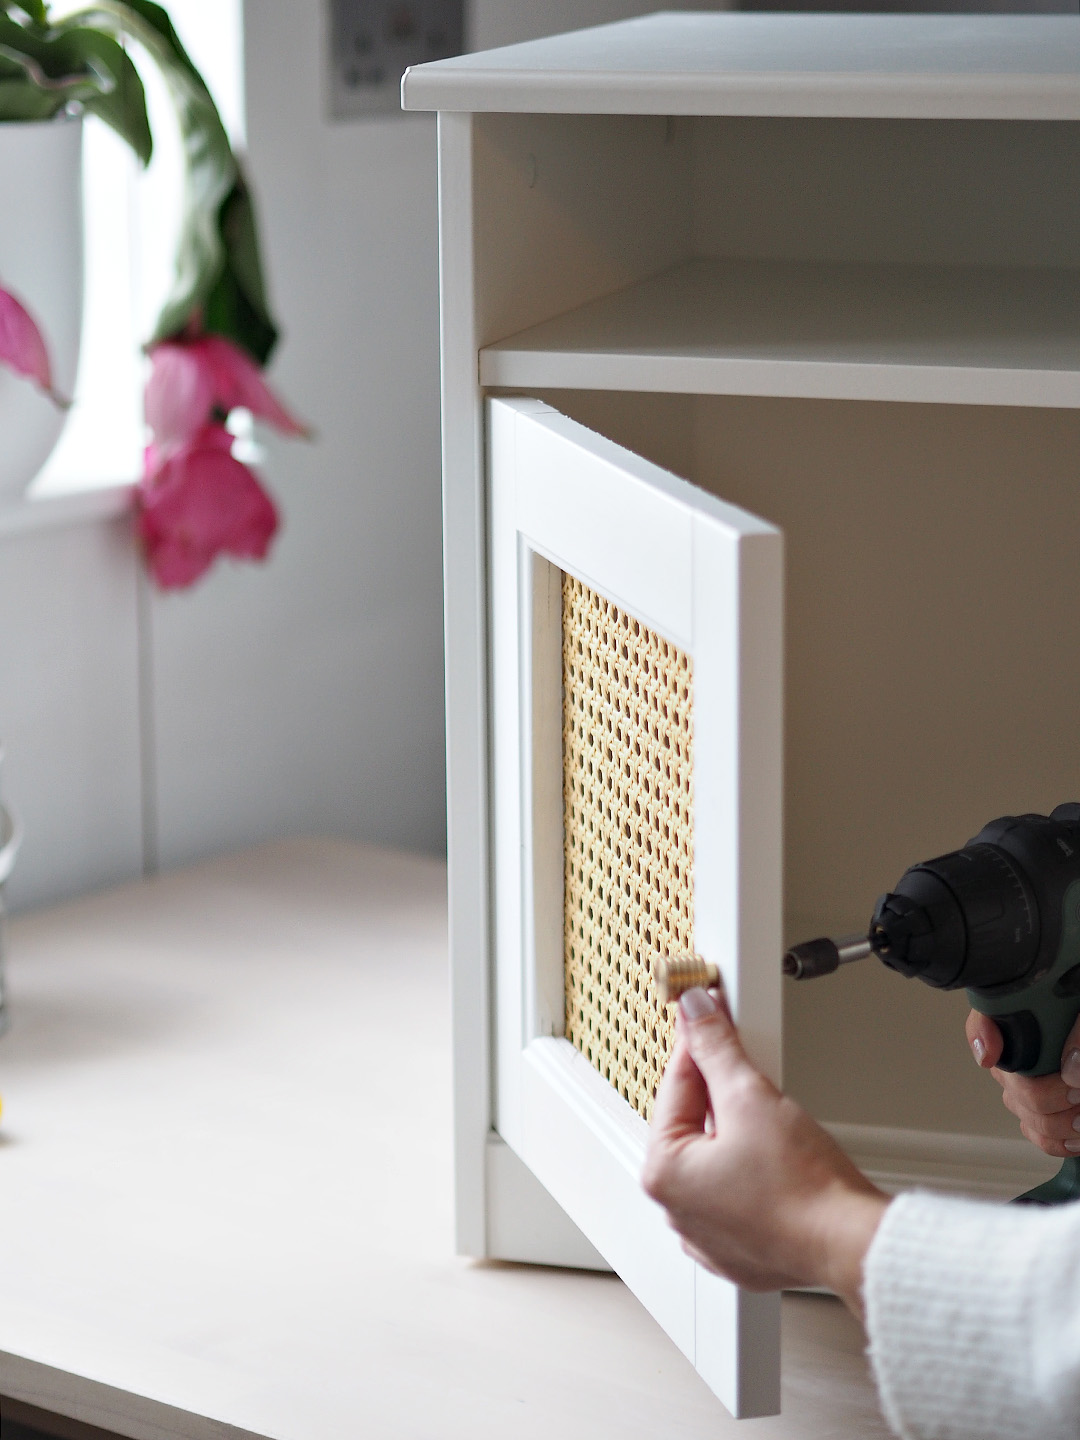
Depending on what furniture you are up-cycling, you may need to take it apart, or if you are building from flat-pack, you will need to put your furniture together (leaving the part that you are adding rattan to). For this I used the AdvancedImpact 18 Combi Drill. Use protective goggles and ear protection for this step but not protective gloves.

Step 2
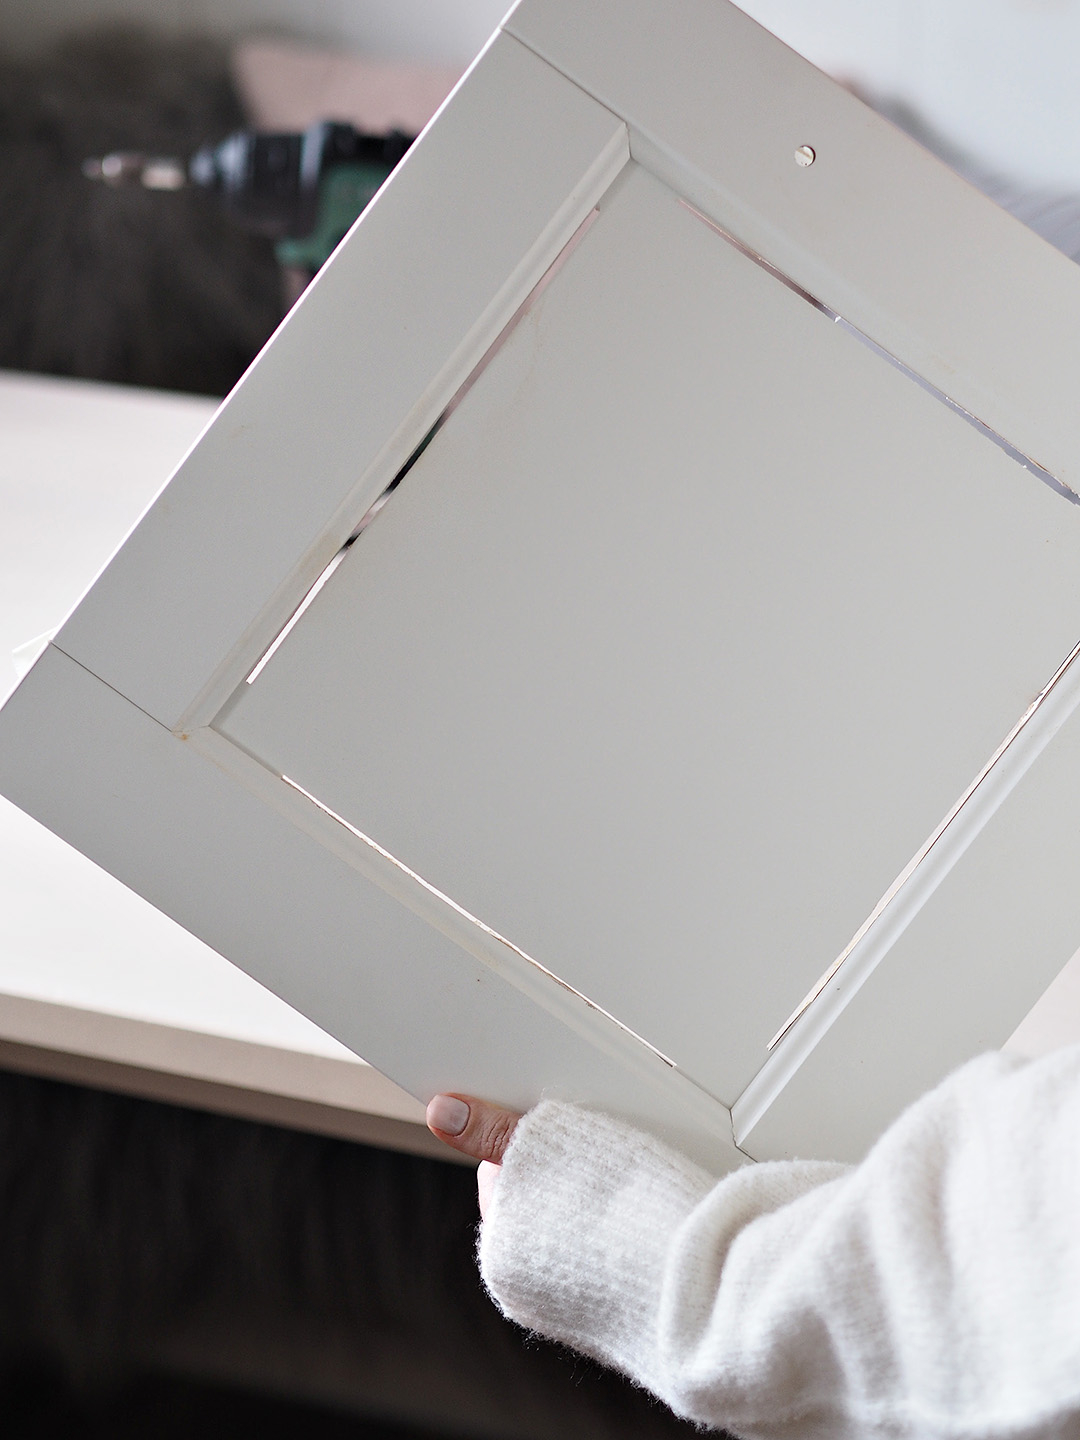
Next, you need to cut out the space that you will be replacing with your rattan cane. You could use a Jigsaw for this but they can shake and I wanted a straight finish so I used the Circular Saw with the metal guide to keep my cutting line steady. I stopped just under an inch before the edge so not to cut into the frame. Use protective goggles and ear protection for this step but not protective gloves.

Step 3
I used a hand saw to finish the cuts off in the corners carefully so that I am left with the frame ready for the next step.

Step 4
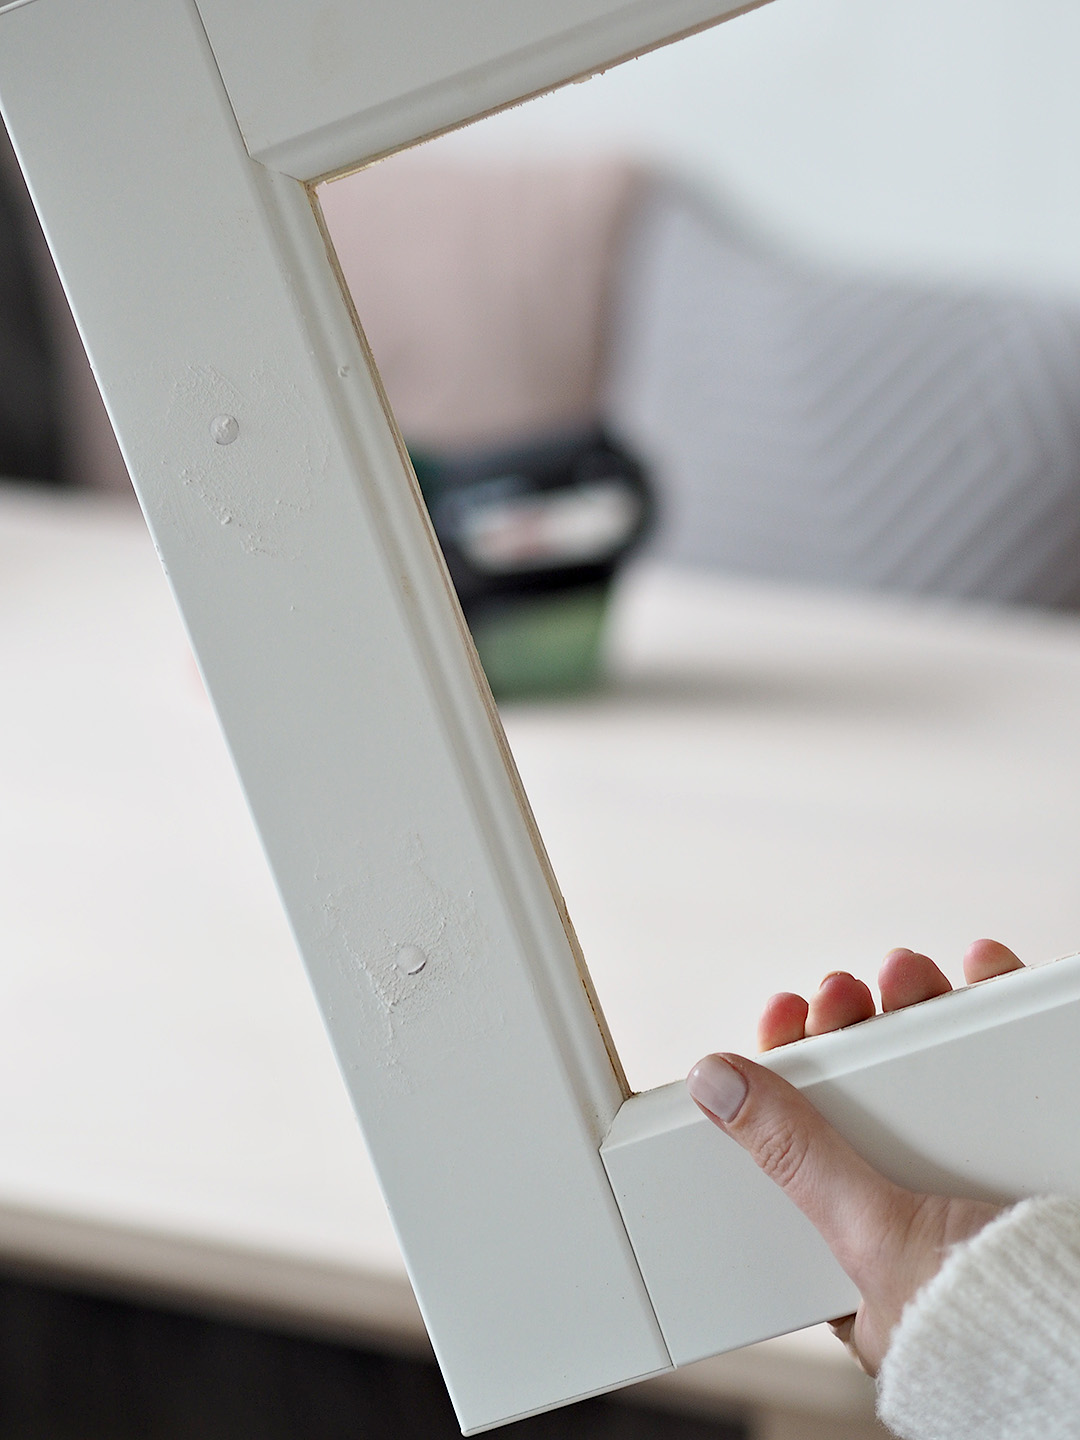
For a professional finish you need to sand the inside of the frame using the Sander so that is straight and tidy and smooth to run your finger along the edge.
Use protective goggles, ear and breathing protection for this step.

Step 5
If you are changing your handle placement like me then you will need to fill the existing holes with wood-filler and allow this time to dry before sanding.


Step 6
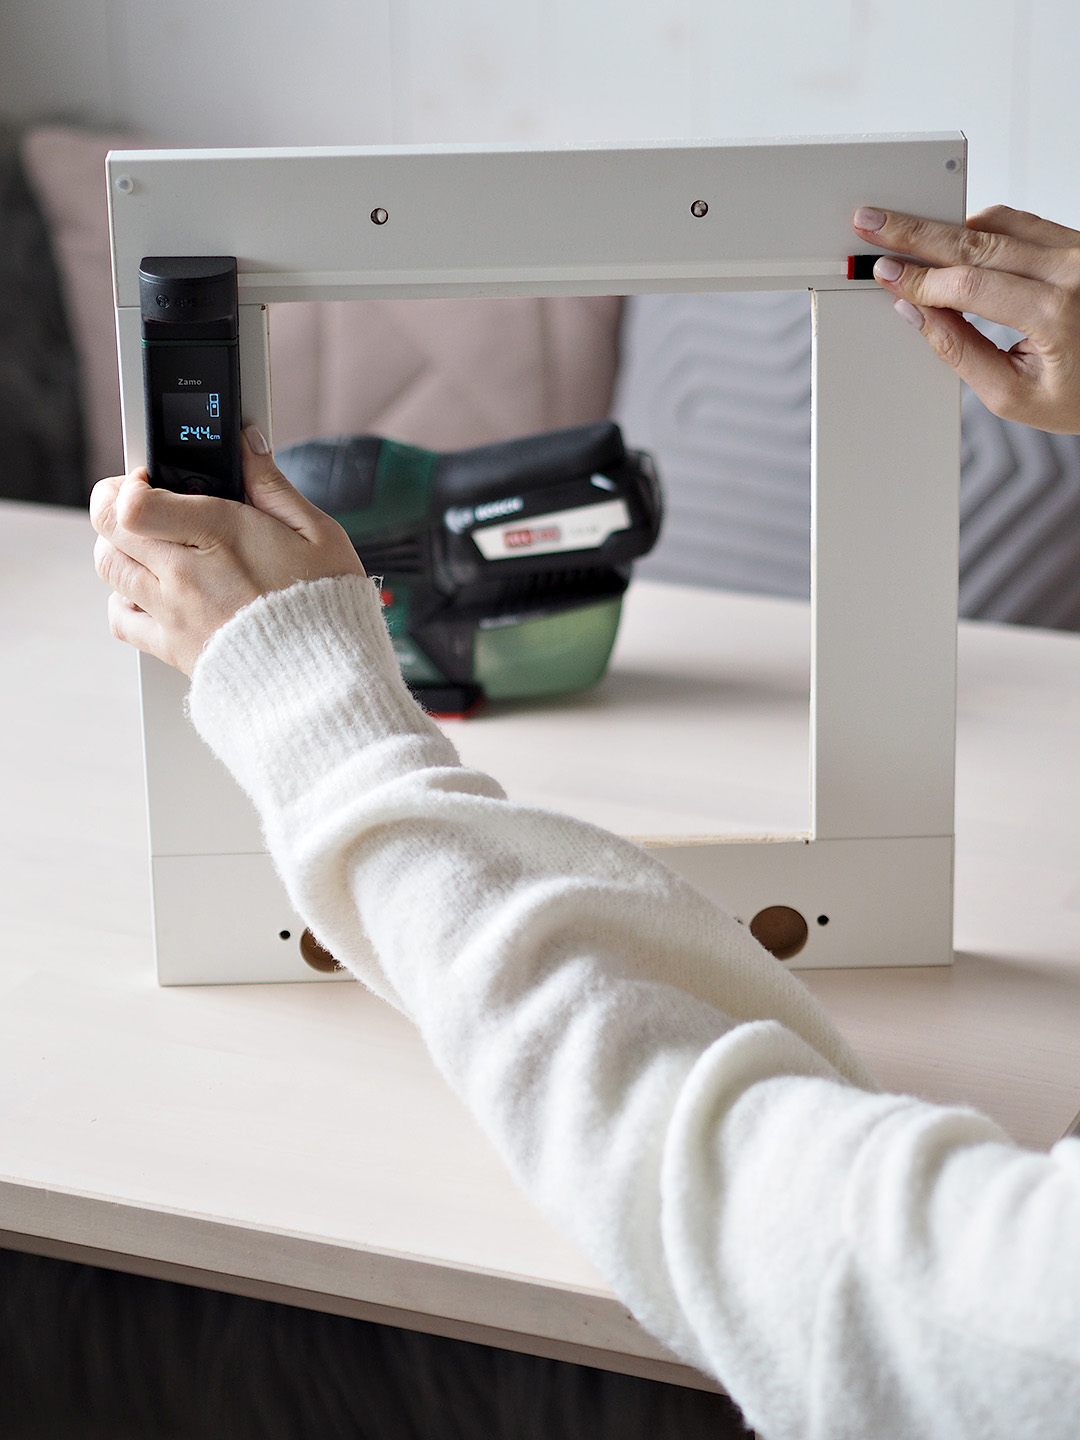
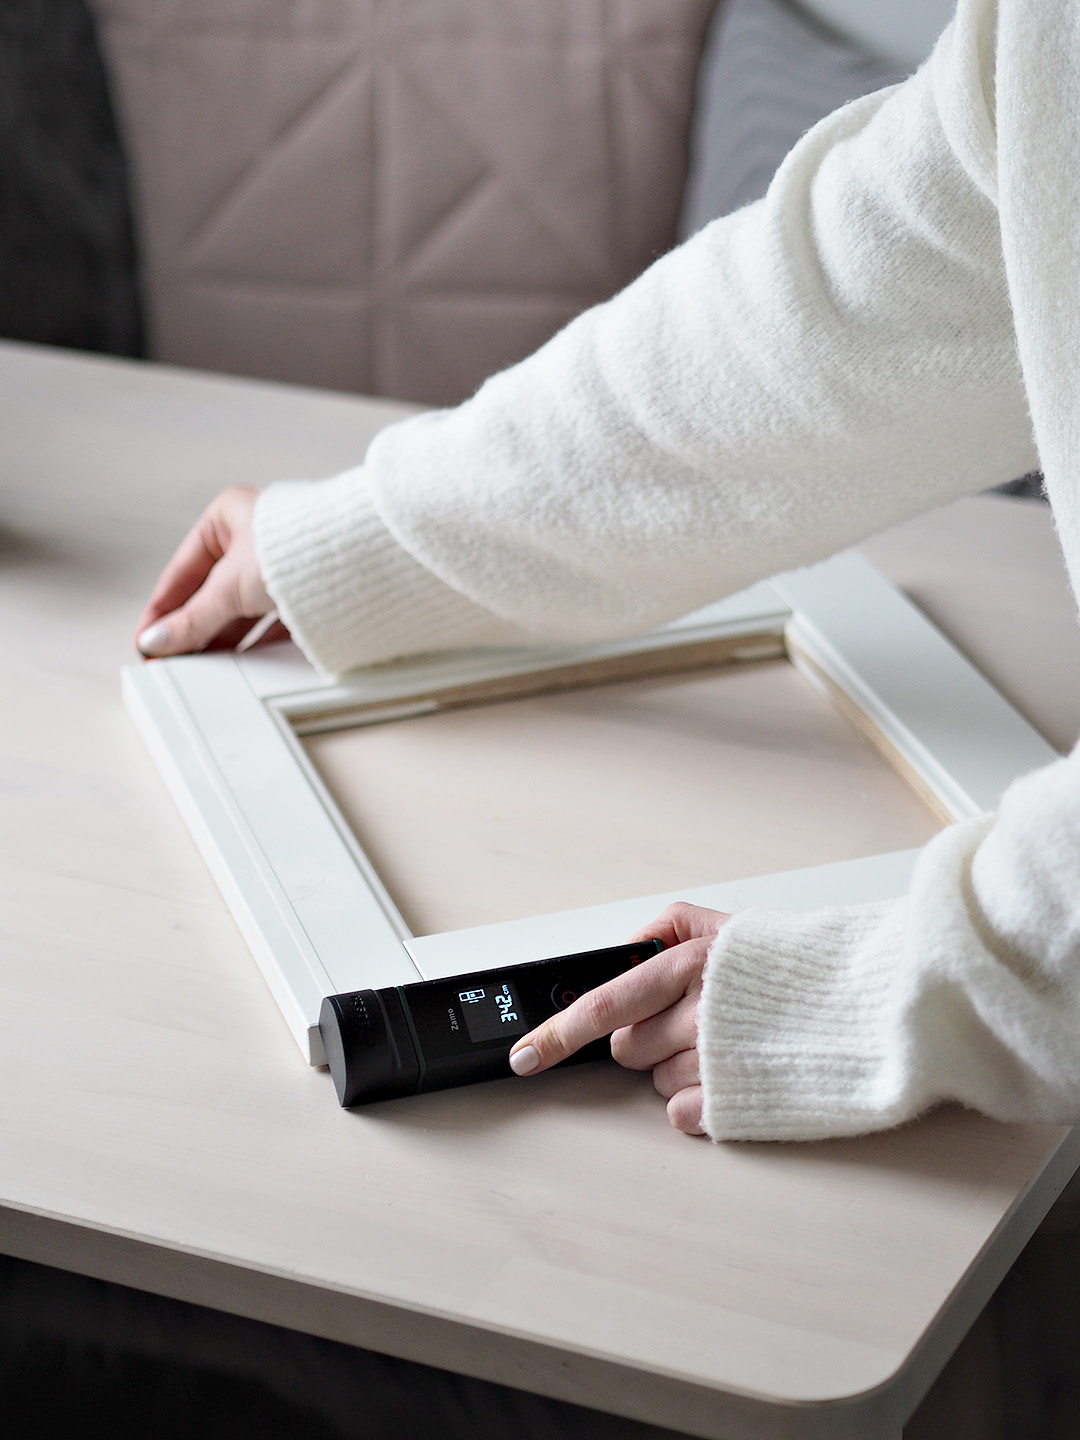
Whilst I am waiting for the wood-filler to dry I use my favourite tool – the Bosch Zamo Laser Measure Set – it’s basically a super smart, incredibly accurate modern day tape measure without the faff! You can use it four different ways, this is with the pull out tape measure attachment and I’ll show you another way later on! I measure up the back of the frame where I will apply the rattan cane – ensuring there is an overlap of a couple of cm just in case.

Step 7
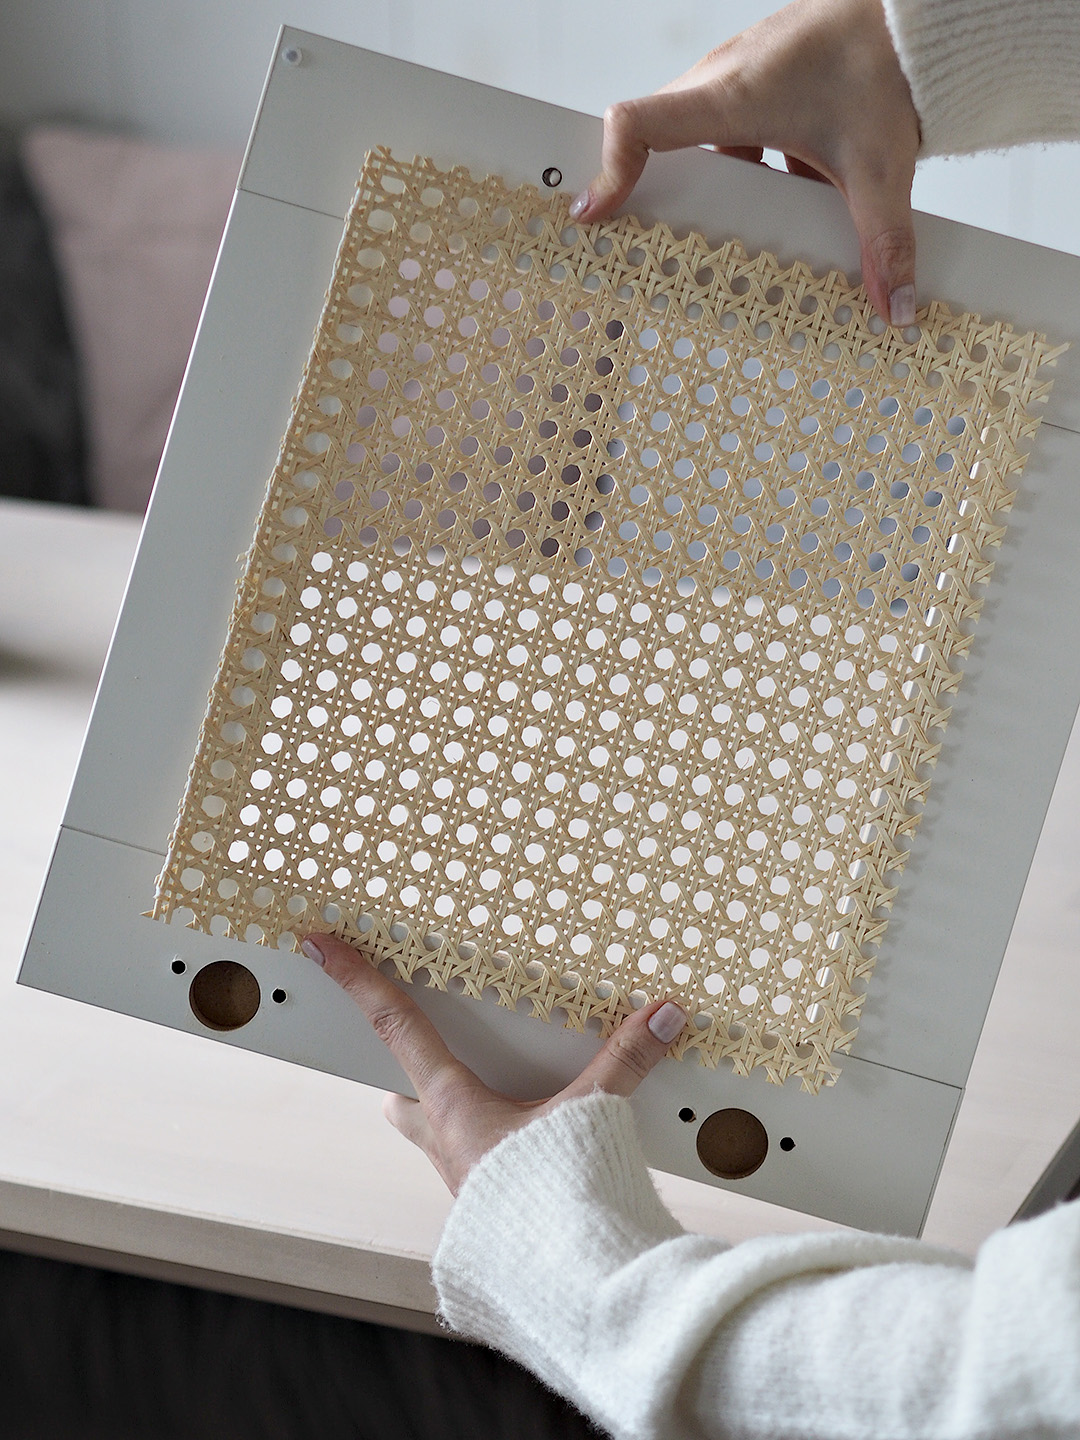
Using the same technique, I measure the rattan cane and cut with scissors – trim any untidy edges so it is neat. When you are working with rattan cane, it is best to let it soak in water for half an hour before you fix it to your surface – it expands in water which means when you apply it damp, once it dries it will shrink and will be a tight fit – not loose and flappy.

Step 8
Whilst waiting for the rattan to soak, I use the Zamo Laser Measure Set once again to measure where my new handle will go. Firstly the full length of the door and then I mark up exactly half way in the middle – this is where my new handle will go.

Step 9
Now the wood-filler has dried it’s time to gently buff down the surface with the Sander (Use protective goggles, ear and breathing protection for this step), ready to paint in your chosen colour, I went with white to match our wardrobe, I only paint the door (not the rest of the cupboard as I know from before that this white paint matches the rest of the sides perfectly so it’s not necessary). Be sure to paint the inside of the frame to cover where you cut!


Step 10
Once your paint is dry, using the AdvancedImpact 18 Combi Drill and a drill bit, drill a clean hole where you have marked up for your new handle to go. Use protective goggles and ear protection for this step but not protective gloves.

Step 11
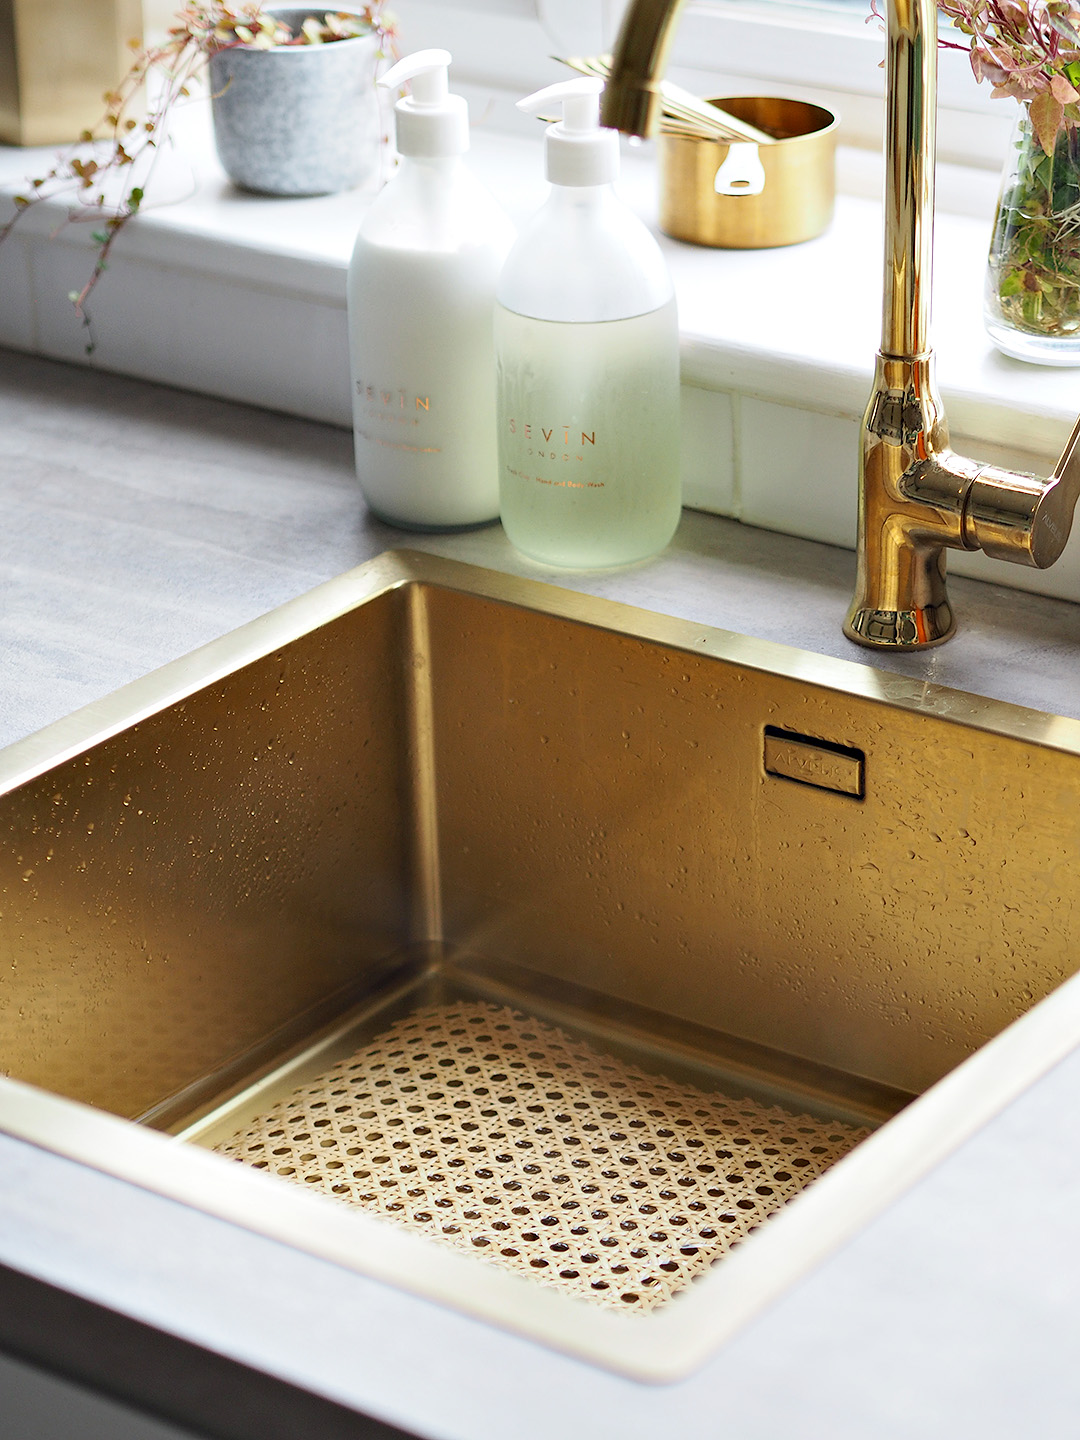
Once your rattan has soaked for half an hour, shake any excess water off and get ready to fix it to the inside of your frame. For this step I used the Tacker – we have had a tacker previously and I wasn’t physically strong enough to pull the trigger so this one was perfect for me and still powerful enough for the job. And it didn’t scare me using it either! But I know some people aren’t confident enough using tools such as tackers so you could definitely use the GluePen if you feel more comfortable – hot glue is perfectly strong enough to use for rattan, we used it on our previous rattan project!

Step 12
The final step! Your door is complete so it’s to fix it back onto your bedside table using the AdvancedImpact 18 Combi Drill. And that’s it! Simple! Use protective goggles and ear protection for this step but not protective gloves.

I just quickly wanted to show another use for the Zamo Laser Measure Set – the laser tool, simply point the laser at a surface and it will give you the precise measurement to that surface, for example – perfect for measuring up a space for a furniture! It would make a great Christmas present for any DIY enthusiast!


I was wondering what brand and colour paint you used to paint the ikea beside table? Did you have to prime it and is it hard wearing? Great job btw. 🙂
Hi, I really love these hacks using cane, unfortunately when using a tacker, this remains visible when you open the doors and the edges of the cane where you cut it don’t look very nice either. I’m still trying to find a solution to that problem, any ideas ?? thanks, I love your nightstand anyway ❤️
Hi there! I know this is kinda off topic but I’d figured I’d ask. Would you be interested in exchanging links or maybe guest writing a blog article or vice-versa? My blog covers a lot of the same topics as yours and I feel we could greatly benefit from each other. If you are interested feel free to send me an e-mail. I look forward to hearing from you! Excellent blog by the way!